Showing posts with label Incubation. Show all posts

Thursday, September 10, 2015

No Baby Bourke Peeps Yet

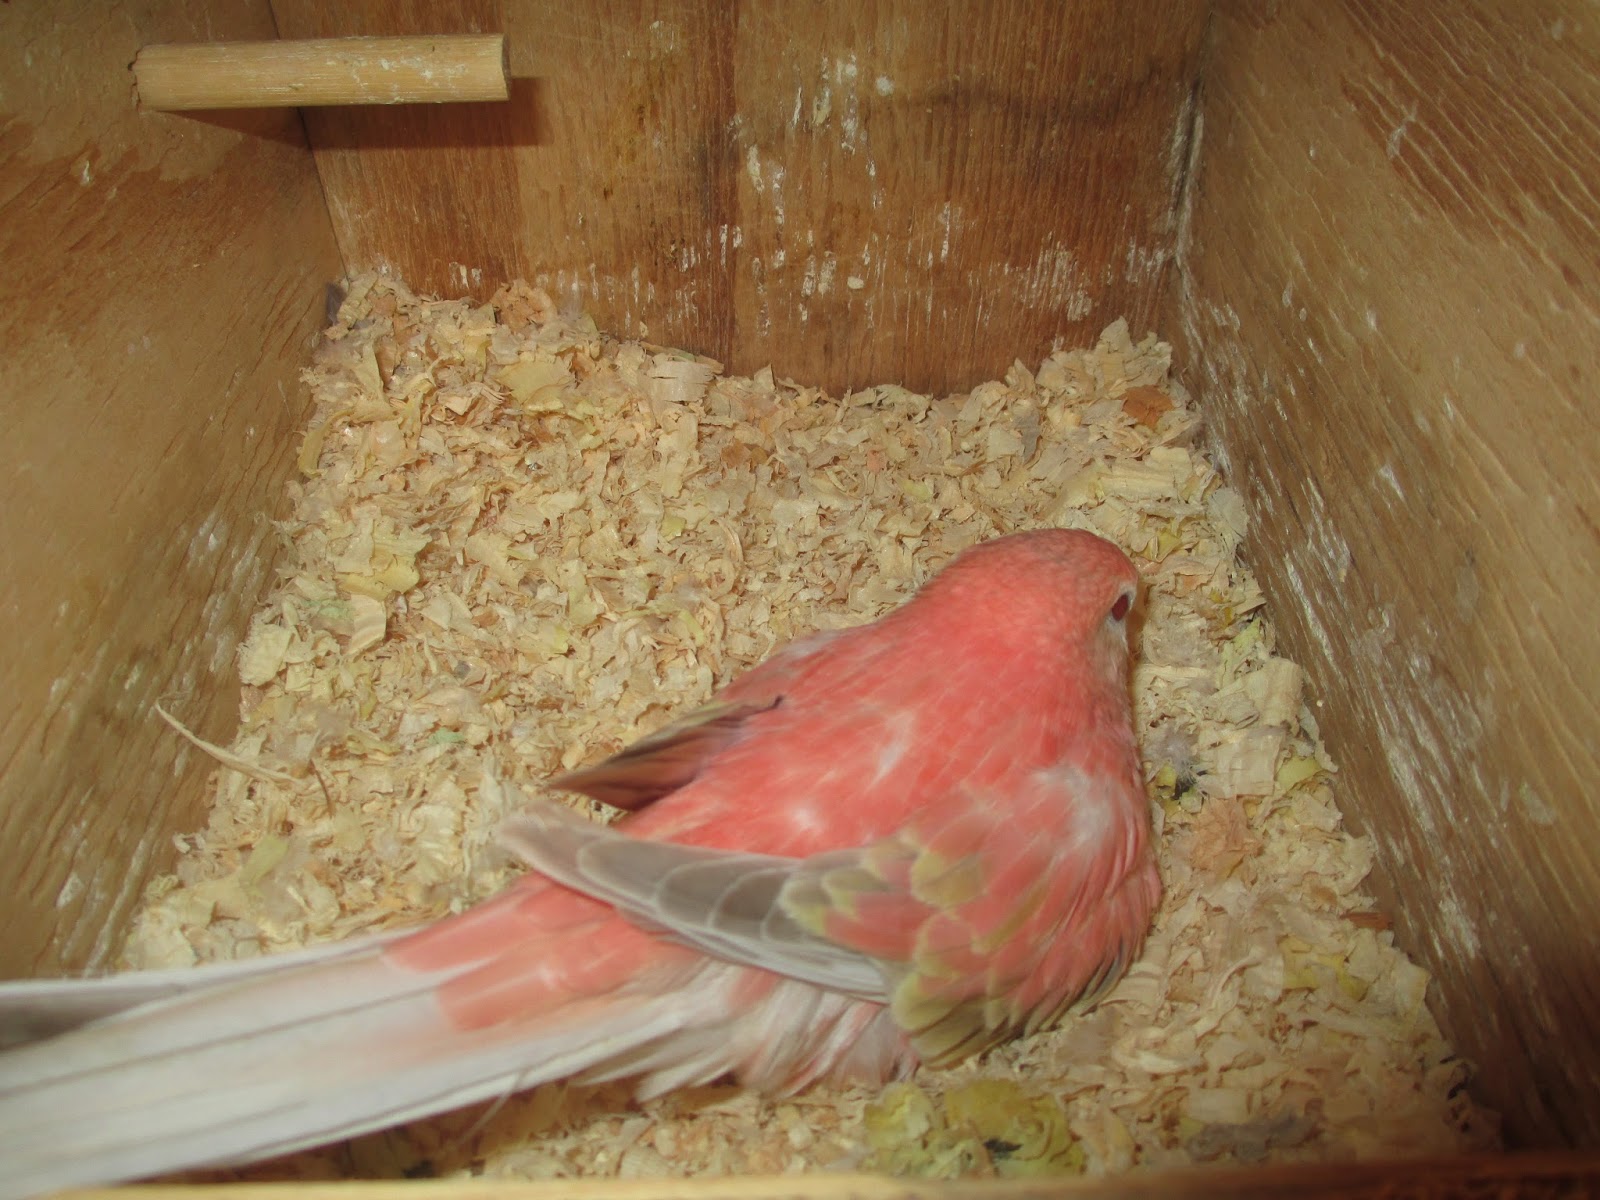
Bourke Parakeet, Peaches, is about to become a mother.
She is an opaline fallow hen with red eyes and very sweet.

I was able to candle two of Peaches' eggs. They are fertile. Since this is her first clutch she's very protective. I candled those two while she was briefly outside the nest box. When she hurriedly returned, I didn't get to inspect the remaining eggs as I didn't want to upset her.
 
I've had experienced hens that were not hand fed or hand tamed who allowed me to move them aside to see their eggs or babies without incident. They trusted me.
 
Peaches is hand fed and very tame. However, she will scold and peck at me if I simply place a finger on the edge of the door to her nest box. She's determined to protect her first clutch.
 
I looked in her box again this evening and don't see any egg shells. That's a definite indication that an egg has hatched. No hatches yet. Although, she did move a bit when she turned to scold me and at least one egg is dark and looks like it's on the verge of hatching. Perhaps tomorrow. Her first egg is 21 days old today. Our weather has been cool some days and that can delay hatching, which is usually 18 to 21 days for Bourkes.

Our male Bourke, Storm, is of Normal coloration, so we may end up
with a diverse clutch like this one from another pair a while back.
Since she and the male are inexperienced, it's possible that the first couple of eggs won't be fertile and only the later three will be. The first two were laid several days earlier than the others, which leads me to consider that possibility.
 
May all your birds stay healthy and happy,
Rosie (who also writes as Zara Heritage on Amazon.com.
My novel, Cast Me Not Away, is available as an eBook or in Print). 


Peace and Blessings.


Monday, August 31, 2015

Bourke Parakeet, Red-Eyed Opaline Fallow Hen on Eggs


Peaches on five eggs, first is due to hatch Labor Day.
Here is the only hen we still have producing. All others had their three clutches for the year. This will be Peaches' first clutch ever. She's two years old, but her mate, Stormy, was only hatched last January. He is feeding her regularly and even going into the box with her already. Most of my male Bourkes wait until the babies are two or more weeks old before they venture into the nest box with their mates and offspring.
 
Because of Stormy's youth, we will watch closely any babies that hatch. There is also the possibility that the eggs won't be fertile, but we witnessed several matings that looked successful to us. We are optimistic. So far, an opportunity to candle the eggs has not occurred. Since it's her first clutch, I'm leaving her alone more than I might otherwise.
 
We will let you know the outcome in a week or two.


As you can see, she changes position while on eggs.

Peaches' mate, a Normal Bourke we named Storm.
His father is a Lutino, so we hope to get interesting babies.

PEACE AND BLESSINGS!


Monday, December 23, 2013

Egg Incubation, Bourke Parakeets & Lady Gouldian Finches - Video of Live Eggs

Video of live Lady Gouldian eggs and Bourke Parakeet eggs taken yesterday. They are kept warm in a homemade incubator and turned every few hours ... even through the night. Temperature needs to remain at 98 to 100 degrees Fahrenheit, or 35 to 36 degrees Celsius. A light bulb under a dish of water provides humidity. There's more detailed information on doing this in earlier posts. Search Incubation or check the Archive titles.


MERRY CHRISTMAS!
Peace & Blessings

Wednesday, December 18, 2013

HAND FEEDING LINEOLATED PARAKEETS


The pair of turquoise Lineolated Parakeets we purchased early last summer decided to lay a clutch in late fall. Two of her three eggs hatched Dec. 10 and Dec. 11, 2013. For whatever reason, the parents seemed to ignore them, pushing them aside to get cold and weren't feeding them. Hence, I'm now hand feeding the pair.

They are 7 and 8 days old in the video and doing fine. We brought the home made incubator up from the basement and installed it for them. It's the same one that we hatched Lady Gouldian eggs in and raised those babies. At least the Linnie eggs were incubated by their parents.

Above is video of them taken yesterday morning, 12/17/2013. The one below is of the home made incubator keeping them warm.


PEACE & BLESSINGS FOR A
MERRY CHRISTMAS!
 

Friday, September 7, 2012

Lady Gouldian Finch Babies, Two Hatched!

About eight hours after the first Lady Gouldian finch egg hatched in our homemade incubator, the second one did too. Exciting! 


Second baby exiting his shell.


With Bourkes I typically leave the baby birds with their parents until they are about three weeks old. This time, however, these eggs were abandoned by the Lady Gouldian pair. They'd raised two clutches of eleven babies. However, with the third they lost interest. All they wanted to do was nest build, cover up their eggs laying new clutches on top of old, breed, and sleep outside the nest, never brooding.


I decided to replace the pine shavings with shredded paper.
I also have several soft pieces of flannel to cradle them in.
The eggs on the left aren't likely to hatch, they are clear.
The one egg that is fertile and laid later, is with the babies.
 
After tossing out over a dozen cold Lady Gouldian eggs, I retrieved the last five she laid and removed the nest box. She laid four more on the floor of the cage before she quit laying. With advice from Gouldian breeder, Su Yin, I removed all egg food and millet from the cage too. She said that good food stimulates Gouldian breeding. So, the pair now have only finch seed; although I left the cuttlebone and mineral block in place.
 
Of the first five eggs, which were transferred to the incubator, two hatched today. A third is fertile and should hatch early next week. It was laid on the floor of the cage and went into the incubator later than the others.
 
Feeding these little ones is labor intensive. I've been advised to feed them every hour for the first two days, and four times during the night. I'm tired of making new formula and feeding them every hour! But, I'm grateful the eggs hatched and hopeful that they will survive and grow to become sweet, tame pets. As they mature the feedings will be less frequent.
 
Meanwhile, my Bourkes will be three weeks old this weekend, so I expect to remove them and start handfeeding the five. I'll post about them soon.
 
Larger birds are much easier to hand feed. These itty, bitty, little baby finches are a challenge! Funny, because I considered hand feeding some from the parent's clutches and decided not to because they were so small. At three weeks they were not as small as these are now...new, tiny hatchlings. Smile.

I feel very fortunate and very blessed.

Peace and Blessings.


Artificial Incubation A Success - Handfeeding Lady Gouldian Finch Baby

First feeding for baby Lady Gouldian finch.
This bird was hatched in a homemade incubator from day one.
 
Hurray!

Here is our first Gouldian finch hatchling. Now the fun begins. Feeding such a tiny little sprite is a lot more troublesome than feeding a baby Bourke parakeet. This little fellow's beak is so tiny. The eyedropper is too big for it.  A Lady Gouldian site suggests beginning with a toothpick. Hmmm...the liquid Exact is so thin. 

This photo was taken at the very first feeding. I woke at 4am and my conscience told me to go check the incubator. Did I? No. Rolled around and ignored the nudge. Lazy me. I didn't get up until 7am and there he was! There is another egg that should hatch today, God willing.

Got some food in him in spite of the inexperienced person
feeding him with an inadequate eyedropper.

Things are still touch and go, but my husband feels proud that the incubator he designed and built was successful. Now, the feeding is up to me. Pray for me, that my ability will be helped with divine intervention. If he survives, it won't be because of me. This little bird is a miracle. Come to think of it, so is every baby of every kind. Miraculous.

Peace and Blessings.

LATER UPDATE: Although both of these babies survived to adulthood, with later baby Lady Gouldians we used a dental pic with the tip cut off and smoothed out. It is too easy to "drown" a tiny baby finch like this with the dropper. The dental pic, or a very tiny paint brush with only two or three strands, works better for birds this small.


Wednesday, September 5, 2012

Artificial Incubation of Eggs in a Homemade Incubator

I've hesitated to post about this, waiting to see how successful it would be. But, I've decided to go ahead. We have two eggs that are due to hatch in 3-4 days and another that is fertile and should hatch (hopefully) much later.

Thirteen days ago I retrieved five Lady Gouldian eggs that were being ignored by the parents. This after I'd already thrown away 17 she had laid earlier and didn't keep warm. I removed the box and she laid more on the floor of the cage. Two were damaged, but two were not, so they were also retrieved.

Seven Lady Gouldian eggs we are attempting to incubate when parents
didn't. Actually, we only expect three of them to possibly hatch, but
see no reason to give up on the others right away.
My husband brought up the homemade incubator he'd put together several years ago. At that time, we had tried incubating two Bourke eggs from a hen who had been egg bound. With treatment she survived and went on the following year to lay more eggs. However, none of her eggs ever hatched, including the two we tried to incubate. Yet, they did mature right up to the day they should have hatched, just like her own eggs did the following two years. Some genetic abnormality, perhaps?

Back to the Lady Gouldian eggs. Two babies are moving in their shells and I've quit turning them as instructed at several websites. One of the best I found on incubation and egg repair appears to be this one: http://www.gouldianfinch.info/breeding/eggs.htm

This time we created a humidifier thermometer to check humidity. That thermometer is in the blue box with a shoelace extended into the bowl of water below. This process was explained on a website we found.
 
The temp. in the box has been about 99 degrees (supposed to be 99.5F) most of the time. However, when the top of the box is opened to turn the eggs, the temp. drops momentarily. I'm hopeful that's no different than if the mother hen were to leave the box. A 25-watt bulb heats the former cockateil nest box. A dish of water is under the screen that holds the box of eggs and yesterday I added a second bowl of water to increase humidity as advised for the last two or three days of gestation. The item in the bowl shown in the photo is not a bar of soap, it is an absorbent cloth.

Wish us luck, say a prayer, and check back Saturday or Sunday to find out if, God willing, the Lady Gouldian eggs hatch. I certainly hope so, even though it will mean getting up in the middle of the night to feed them for the first week or so. I've already been getting up once to turn the eggs, and rotate every couple of hours during daylight hours. With an angel's help, that has kept two of the five alive so far, and one of the younger eggs has a smaller embryo that is alive too.

How fun it would be to raise them to maturity. But, even if they don't survive...as disappointing as that might be...it's been an interesting endeavor. Seeing them move in their shells is exciting. And, as my husband says, "We've nothing to lose." (Except some sleep, smile).

Peace and Blessings.

Tuesday, June 19, 2012

Fuchsia's first egg has hatched.

There is an egg shell in Fuchsia's nest box today, although the baby is hidden under her. She's hatched her first egg of the season. It surprises me that Rosie hasn't hatched an egg yet. She was the first to begin sitting on her eggs. Just goes to show the 18-21 day range is subject to wide variation, especially from one Bourke hen to the next.

Friday, December 31, 2010

Bourkes Laying Too Many Eggs. Why and What to Do.

Someone searching the internet for "my Bourkes are laying too many eggs," reached my site. I haven't addressed this question before, so here goes...

More than one hen in this box.
First, are you sure you have a pair of Bourkes and not two hens? Bourke hens—especially sisters or mothers and daughters—will sometimes share a nestbox, hence many eggs although not all from the same bird. If you have multiple hens present, provide at least one nestbox per hen. Extra's are even better so that they won't argue over the same box.

Are they in an aviary setting with several birds and not everyone has a mate? A hen alone will often lay many eggs if she doesn't have a male with her. She can be so eager to raise babies that she just keeps laying. I've seen Normal Bourke hens (wild color) do this more often than Rosy Bourkes.

If you're certain you have a pair, one male and one female, they may not be compatible and haven't bred. If her first clutch wasn't fertile, she may lay more eggs in an effort to have fertile eggs. The later eggs just might be fertile, so don't remove any of them unless you know for sure when each was laid. This is often not an easy thing to determine as, unlike some other birds, Bourkes go right back to laying. If you're lucky, the hen's first infertile eggs will simply help keep later fertile eggs warm.

I had one Normal Bourke hen who sat on a dozen eggs and four hatched! Having too many didn't mean that the fertile ones were harmed because there were too many. She managed to cover all of them. The first ones she laid were not fertile, then she bred and added to her clutch. I could have candled the eggs and removed those that appeared to have no life, but decided not to bother her.

If your bird is fairly tame, you can pick up eggs and hold them over a flashlight, but wait to be sure you know they are several days old before doing that. After a few days red vessels begin to show in fertile eggs. Myself, I'd rather let the hens decide which eggs are good and which are not. I usually leave them alone until the hens give up on them.
Fluffed out as far as possible to cover all the eggs.
Broken shell indicates an egg has hatched!

Experienced hens can tell the difference between good or bad eggs. Infertile eggs help keep the others warm and should be left there. Even after babies hatch, any remaining eggs add warmth. Eventually, eggs dry out and become very light. At that time, hens usually discard them if you haven’t already. They will push aside eggs that are no good, maybe even toss them out of the nestbox onto the ground.

I usually don't remove extra eggs until all the babies leave the nest. Then the nestbox should be cleaned anyway before it is used again.

If you are unsure about an egg, perhaps you think it's old, but worry about tossing out a good egg; here's a test. Take a cup of warm water (not hot, not cold, but warm to your touch), and gently place the egg in it. Good eggs sink. Old eggs float. Floaters can be thrown away. Gently pat the good egg off and replace it. A little moisture won't hurt it. In fact, hens need a water source for bathing as they may need to take water in their feathers back to the nest to keep the eggs moist.

Be sure to have lots of calcium sources available for your birds. Each pair should have a cuddle bone, mineral block and it's wise to add oyster shell. Some birds will ignore the other two, but use the oyster shell. Fresh greens are excellent too. Our birds love kale. If you have only one bird, it is still wise to offer fresh greens, although more important for breeding birds. On an earlier post, I gave the calcium amounts in various fresh foods.

After a hen has raised two or three clutches, remove the nestbox and let her rest for the remainder of the year before returning it. Or, at the very least, leave a minimum of three or four months between her previous clutches before returning the nestbox. I prefer to limit my birds to three clutches a year as I don't want to over-tax them. Returning nestboxes stimulates them to breed, as does day length — either natural or artificial light for twelve or more hours per day. If you don't want to raise birds and they are still laying even without a nest box, add more hours of darkness. If necessary, cover the cage with a dark cloth for two or three hours a day. You can also remove whatever they are laying eggs in ... a feed cup, for instance.

I've talked mostly about hens, however, the males also work hard at raising the young. They feed the hen while she's on the nest and once the eggs hatch, their work steps up. They must feed her more often. Some males enter the box to help feed the young, but normally they wait until the babies are feathering before doing this. After the babies leave the nest, they still need to be fed and most males take this over almost exclusively. By now, most hens are thin and need to recover. Depending on how many youngsters he has to feed, he's kept very busy. Older males may suffer more than younger ones and should be watched closely.

One of my older pairs were on their third clutch last summer when I decided to pull their two-week old babies and hand feed them. Rhett, my first Bourke was looking slightly "natty" and mom was too thin. These are not young birds, but they still want to produce, so I've let them. Although I took their babies, they weren't upset. Perhaps because they felt they'd done enough, were tired and glad to be empty nesters for a while. Also, they could hear their young when I fed them. The babies were moved to a small cardboard box, and placed near a space heater. Now, I’ve become so attached to these tame sweethearts, that I probably will never sell them. That's a risk when you hand feed!

Have a SAFE and SANE New Year's Eve.
Remember, you don't need alcohol to have a good time.
God Bless and Protect you and yours through 2011!

Thursday, April 29, 2010

Incubation Observation & Other Thoughts…

(Watch for Comments at the bottom of each Blog; there may be one or two. The one added to yesterday’s blog, "Splendids," is particularly interesting. There is a Comments button at the end of each blog and it tells you how many, if any, comments there are).

If you’ve followed this blog for a while, you’ll recall our attempt to incubate two Bourke eggs. We were successful right up to the point where the eggs were even piping. It was very disappointing to lose the little chicks after getting them so close to hatching.

The cause, we had decided, might be that we didn’t have enough humidity present toward the end of incubation. More humidity is needed just before hatching. A dish of water was present, but we heard a recommendation to hang a wet washcloth near them in the last few days and keep checking it since it would dry out from the heat lamp.

Maybe that would have made a difference, or maybe not. Sugar, the hen who abandoned those eggs after becoming egg-bound with the 3rd egg, recently laid three eggs. It took her a while to recover from the ordeal we put her through to help her release the over-sized egg. At least she survived.

Sugar kept the three eggs from this clutch warm right up to the point of hatching, but these did not hatch either. After 21 days I was concerned, but left them under her for over 30 days. I wanted her to abandon them herself, but she was more persistent than any other hen I’ve ever had and remained on them – she was very determined, but in the end it did her no good.

Once the eggs were removed from her nestbox, I opened them. One was infertile, but the other two held dead chicks, fully developed and ready to hatch, but apparently they could not. Was it genetics, or something else? Unless she succeeds with another clutch someday, I may never know.

After talking to Bob Nelson, Bird Specialist extraordinaire, he said that the problem of “dead in shell” can sometimes be caused by low iodine in the parents’ diets. His solution has been to provide rabbit salt blocks which contain iodine. I was concerned about the salt intake, but Bob says they won’t consume more than they need. He warned about attaching the salt block to the side of a metal cage or the salt will damage the metal.

Eleven of my cages now have a small salt block available. We attached them each to a perch with small plastic ties (cable ties used by electricians). Getting them tight enough required pulling with a pair of pliers. So far, the birds are ignoring them.
***

As I sit here typing, I see Sugar and Spice mating again. Spicy’s picture is in the column at the left. He’s the very tiny, newly hatched baby being hand fed. At the time, his mother was mated to a much younger male (the only one available), and he wasn’t very good at helping feed the young. To compensate she was only willing to feed the first two eggs that hatched. When we lost the third baby, I paid close attention. Realizing she wasn’t feeding the fourth baby, I removed the newly hatched Spicy and hand fed him. He was my first experience at hand feeding. By the way, his father grew up the following year and the pair successfully raised three or four babies in most clutches thereafter.

Wednesday, January 13, 2010

More on Incubation – What We Did Wrong

I researched incubation of eggs and decided that, although the maintenance temperature for our Bourke parakeet eggs was okay, when they started piping they required more humidity than what was provided. This is likely why they were unable to hatch. I wish I’d acquired this information sooner. However, in the future if fertile eggs are laid on the bottom of a cage, or abandoned, this knowledge will be put to good use!

The average incubation period for parakeet eggs is 19 days from the day the egg is laid. However, 18-21 days is also common. Temperature is very important during incubation. Temperature can vary between the top and bottom of an egg, so turning them about five times every 24 hours is necessary. Overnight can be eliminated, but be sure to turn them late and early again the next morning. Never leave them with the small end up. Eggs should either be placed large end up or on their side. Turn eggs on a 90-degree plane as gently as possible. If they are not turned regularly, chicks may stick to the inside of their shells. Turning should continue until one or two days prior to hatching or until the eggs are piping.

For the eggs’ first week, the temperature should be 101 Degrees Fahrenheit, then 102 Degrees F for the second week, and 103 Degrees F until hatching. If you’re fortunate enough to have a large commercial forced-air incubator where turning is not required, the temperature can be kept at 99-100o F. However, most of us do not have access to that state-of-the-art equipment.

Eggs lose water while being incubated, so humidity is key. For optimum growth, a relative humidity of 60 percent should be maintained until eggs begin to pip. Then relative humidity should be raised to 70 percent. A pan of water is imperative; however, it may not be enough. In such instances, suspending a piece of cloth from the water will provide wick action.

To gauge relative humidity, wrap a wet cotton cloth around the bulb of a thermometer and suspend it in the hatching chamber. With evaporation, the “wet” bulb thermometer will have a temperature lower than that of a dry bulb thermometer in the same chamber.

Ventilation is important too. The older the egg, or the larger number of eggs present, the more oxygen will be used by the developing embryos. Also, more carbon dioxide is released. Ventilation capability must be incorporated in the incubator area.

Testing for fertile, viable eggs: When a hen suddenly died, I removed the eggs from her nest box, expecting the embryos to be dead too. However, I gently put them in a bowl of warm water. One sank and the others floated. I assumed the floaters were no good and discarded them. The one that sank went under another hen and ultimately hatched.

Newly laid eggs will display red veins if they’re fertile. These should appear very soon, but I’d give the eggs a few days before discarding any. If, after a few days, you shine a flashlight through the shell and all you see is clear liquid and a yellow yolk, the eggs weren’t fertilized. I tend to let my hens sit on them anyway, until the hen decides to abandon them, but that’s a personal choice. Maybe they’d go back and lay good eggs sooner if the infertile eggs were removed.

Incubating eggs may seem complicated, but consider the fact that the Chinese developed artificial incubation as early as 246 B.C. And, in the year 400 B.C. Aristotle wrote about Egyptians placing eggs in dung heaps and successfully incubating them. Personally, I’d rather use a light bulb and thermometers.

Happy incubating and good luck!

Friday, December 25, 2009

Egg Results...

It would seem that the little guys in the eggs being incubated weren't strong enough to make it out of their shells. Sad. I heard pipping from an egg at one point, and was optimistic, although it didn't seem very loud. I thought perhaps the bird needed more time to peck its way out.  By next morning the pipping had stopped and pessimism took over. I wondered if I should help it out of the shell, but everything I'd read said to never "help" a bird hatch. If I had helped, and it had died, I would have blamed myself.

These two eggs had a rocky start, perhaps leaving the babies weak and unable to get out of their shells on their own. I'm inexperienced at incubating eggs ... this was the first try. However, the incubator will be kept and used again with any other abandoned eggs that appear to be fertile. Maybe next time... God willing.

It was fascinating to see the baby birds move in their shells. If only ...

Meanwhile, our handfed youngsters, the "fabulous four," are still doing well. They're beautiful, tame and happy.

Friday, December 18, 2009

Incubated Eggs...

As an update... The two eggs are still moving inside and alive. Whether they hatch or not will depend upon the strength of the babies. Since the eggs were allowed to cool under three different hens before being moved to an incubator, that could have weakened the babies. By my calculations, one egg should hatch by today and the other next week. However, the cooling off periods may have delayed development. I'm still hopeful!

As promised ... here's the high tech egg candling device that's highly successful at determining the viability of an egg. Smile. A high-powered flashlight and a toilet paper roll insert with duct tape over one end. Cut a hole small enough to lay the egg on without allowing it to fall through. Shine flashlight into the open end of the toilet paper roll insert. Did I really need to tell you that? Hold onto the egg so that it doesn't fall off! Probably didn't need to tell you that either.

Monday, December 14, 2009

Homemade Egg Incubator ...

Problem: An egg-bound hen with two abandoned fertile eggs. She’s fine now, and I’ll review how we helped her lay that egg in another blog.

Solution: Incubate them. Whoops, no incubator. That problem was solved in 15 minutes. Here’s how we made a still-air incubator – one without a ventilation fan.

First we gathered our materials: an unused Cockatiel nest box, a piece of sturdy welded wire, a small thermometer, a glass dish for water, a large washer, nuts, and an electrical light socket with cord.


Next, hubby drilled a hole through the side of the box at the proper height for the light socket’s shaft. After fitting the shaft through, he put on a large washer and tightened it down with a nut. We screwed in a 25 Watt bulb, folded some aluminum foil, and put it under the bulb to reflect the heat into the box. The glass dish holds water. It will evaporate and help keep the air around the eggs moist.

With the basics in place, he cut the welded wire to size and folded it to form a “floor” above the bulb and attached the thermometer to the back wall of the box. Then we added a “nest” — a small cardboard box with tissue padding. And the egg’s new home was ready!

We plugged in the bulb and let the box pre-heat before placing the eggs. We’ve found that the thermometer reads a consist 98 degrees…just about right. We developed several hi-tech solutions to achieve optimal temperature. If the temperature is a little too low, move the box closer to the bulb. If it’s too high move the box away from the bulb. If the incubator overheats, raise the lid slightly and stick a pencil in to hold it up. The more heat you need to dissipate, the further back you put the pencil.

And that’s it. In about 15 minutes we had our handy-dandy still-air incubator. Say a prayer for our eggs. I can see movement when I candle them. (On my next post I’ll show you our hi-tech egg candling device. I’ll also let you know how this grand experiment turns out.)